Playwright Test Annotations Guide

Playwright Test is a powerful, well thought out test framework that helps you streamline and enhance your testing workflows. The Playwright team has carefully thought about various workflows related to software development and testing which makes it one of the best options out there. In this post we'll go over it's useful annotations feature that make tests more organized, flexible, and efficient.
Introduction
Playwright allows you to attach two types data to test results:
-
Annotations (this post): Annotations provide a richer way to attach data to your test result. Each annotation is an object that a
typefield and an optionaldescriptionfield. Playwright comes with several special annotations out of the box, but you can add as many additional types annotations as you want. -
Tags: One or more tags can be attached to a test and used to organize your test runs as well as a useful way of filtering your test reports. Each tag is a string. Playwright automatically tags test results with the browser type (i.e. chromium, firefox, webkit). Additional tags are up to you. See our post on tags for more details.
Understanding Annotations in Playwright Test
Annotations in Playwright Test are data or special markers that you can attach to your tests or test suites to modify their behavior or to convey information about them. Annotations are a powerful way to manage test execution and report generation directly from your test code, making your tests more readable and maintainable.
Special Annotations
Special annotations have specific meaning to Playwright. A quick summary of the different special annotation options:
-
test.skip: This annotation allows you to skip a particular test or suite of tests. It's incredibly useful when you have tests that are not relevant under certain conditions or if you're working on a feature that's not ready for testing or if you want to skip a test under certain conditions.
-
test.only: If you want to run a specific test or suite and ignore all others,
test.onlyis your go-to annotation. This is especially handy during development when you're focusing on a particular feature or bug. -
test.fixme: Mark tests that are known to be failing and need attention with
test.fixme. This annotation effectively skips the test but does so with the implication that it requires fixing, serving as a reminder for developers. -
test.fail: Marks a test as "should fail". Playwright runs this test and ensures that it is actually failing. This is useful for documentation purposes to acknowledge that some functionality is broken until it is fixed.
-
test.slow: Marks a test as "slow". Slow test will be given triple the default timeout.
Check out the Playwright API documentation for more details.
Special Annotation Examples
test.skip
If you want to skip a test all the time (e.g. you're working on a feature that's not ready for testing yet):
import { test, expect } from '@playwright/test';

test.skip('never run', async ({ page }) => {
  // ...
});
On the other hand if you want to skip a test under certain conditions only:
import { test, expect } from '@playwright/test';

test('Safari-only test', async ({ page, browserName }) => {
  test.skip(browserName !== 'webkit', 'This feature is Safari-only');
  // ...
});
test.only
If you want to focus a test run to one or more tests only.
test.only('focus this test', async ({ page }) => {
  // Run only focused tests in the entire project.
});
test.fixme
Mark a test with this annotation if you intend to fix it later. It skips the test for now but is intended to remind developers that it still needs fixing.
import { test, expect } from '@playwright/test';

test.fixme('to be fixed', async ({ page }) => {
  // ...
});
test.fail
This marks a test as "should fail". Playwright will run the test and ensure that it does indeed fail.
import { test, expect } from '@playwright/test';

test.fail('not yet ready', async ({ page }) => {
  // ...
});
test.slow
You can mark a test as slow by calling test.slow() inside the test body.
import { test, expect } from '@playwright/test';

test('slow test', async ({ page }) => {
  test.slow();
  // ...
});
Or alternatively only under certain conditions:
import { test, expect } from '@playwright/test';

test('slow in Safari', async ({ page, browserName }) => {
  test.slow(browserName === 'webkit', 'This feature is slow in Safari');
  // ...
});
Or the same thing but for the whole file:
import { test, expect } from '@playwright/test';

test.slow(({ browserName }) => browserName === 'webkit', 'all tests are slow in Safari');

test('slow in Safari 1', async ({ page }) => {
  // ...
});
test('fail in Safari 2', async ({ page }) => {
  // ...
});
General Annotations
Annotations allow you to attach something more complex than a simple tag. Each annotation has a type and a description:
import { test, expect } from '@playwright/test';
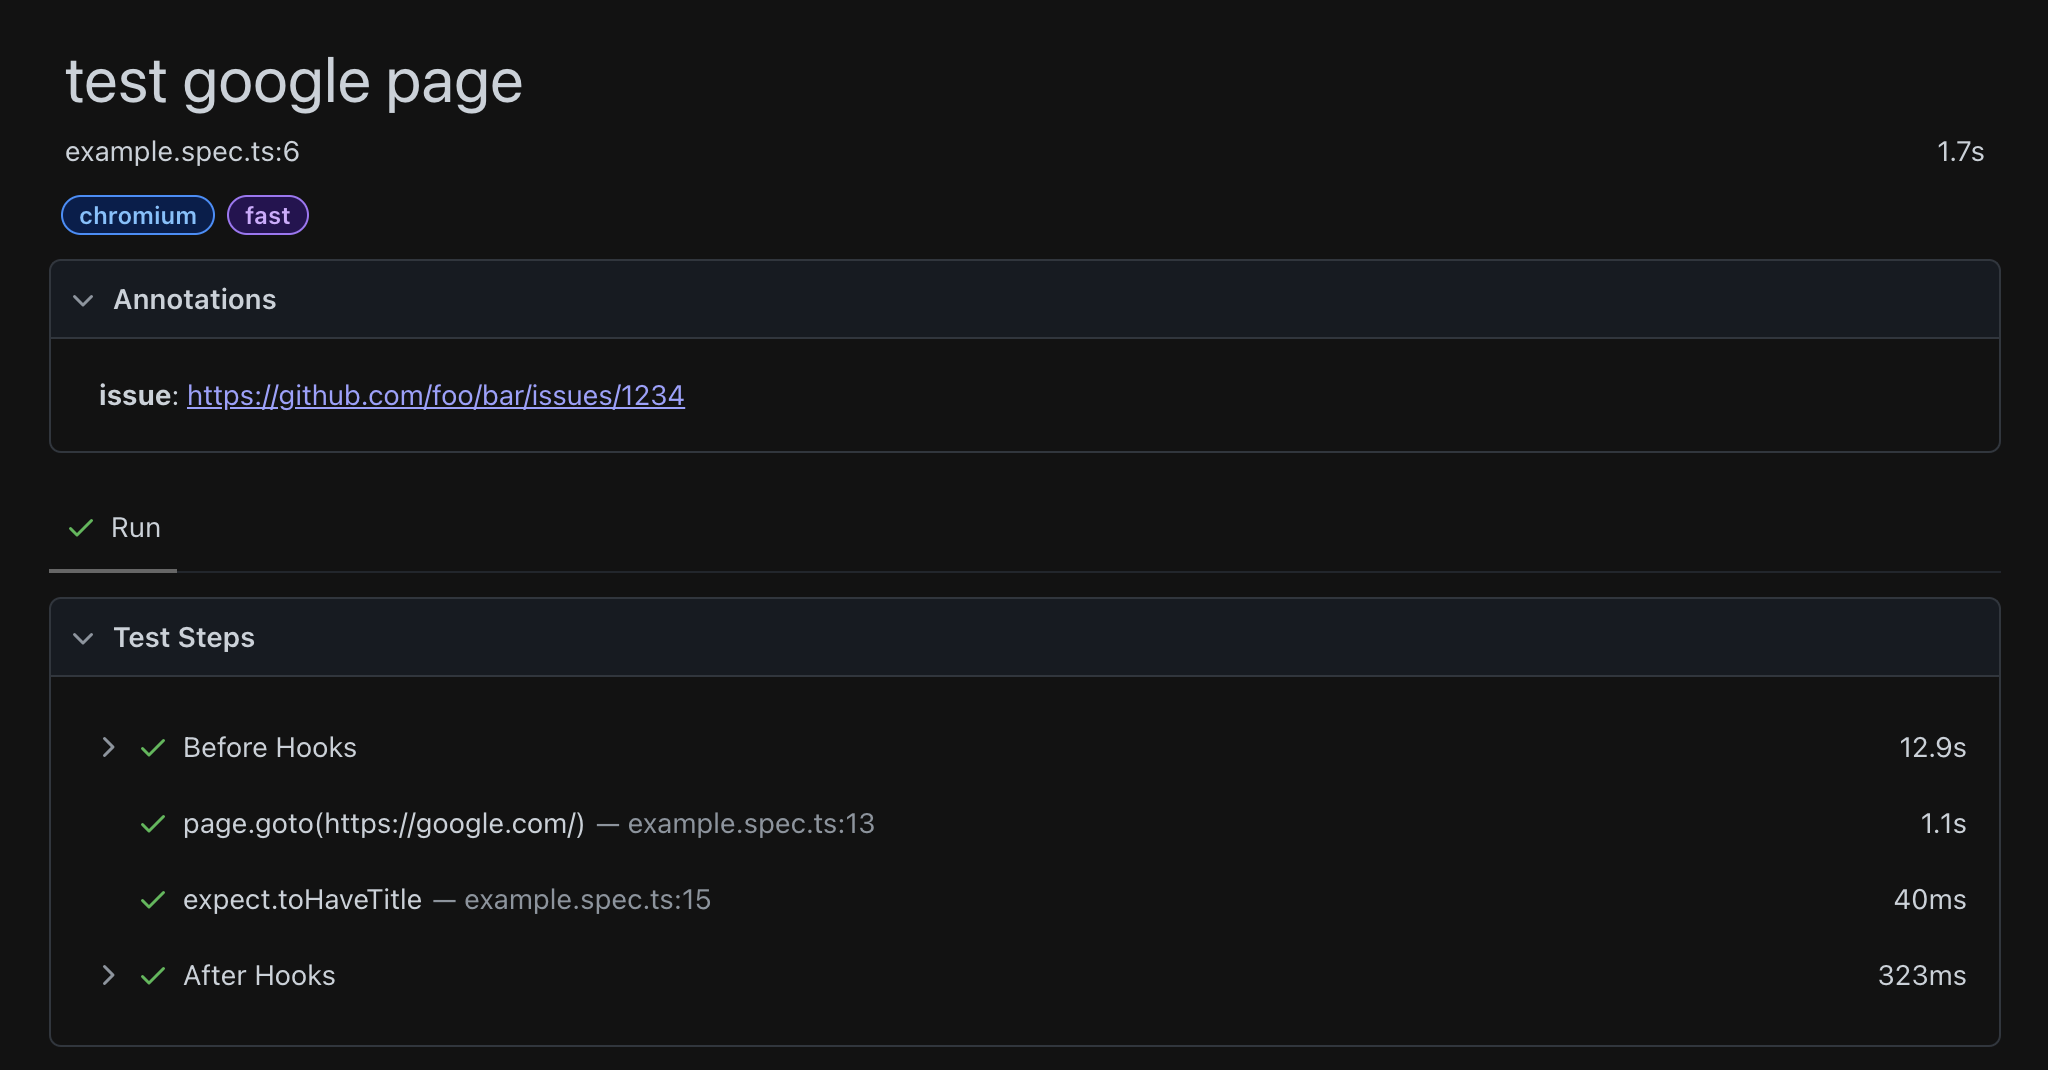
test('test google page', {
annotation: {
type: 'issue',
description: 'https://github.com/foo/bar/issues/1234',
}
}, async ({ page }) => {
// test code here
});
Annotations appear in the test report:
Multiple annotations can be applied by providing an array. Annotations can also be applied to all tests in a group.
import { test, expect } from '@playwright/test';

test.describe('report tests', {
  annotation: { type: 'category', description: 'report' },
}, () => {
  test('test example', async ({ page }) => {
    // ...
  });

  test('test full', {
    annotation: [
      { type: 'issue', description: 'https://github.com/foo/bar/123' },
      { type: 'performance', description: 'very slow test!' },
    ],
  }, async ({ page }) => {
    // ...
  });
});
Conclusion
Integrating annotations into your Playwright Test workflow can dramatically improve your testing efficiency. By using annotations, you gain precise control over which tests run and how they behave.
Testable Cloud allows you to run your Playwright Test scenarios and collaborate on the results, get detailed reporting, execute tests across the globe, setup success criteria and notifications, and reuse your functional tests as load tests. See https://testable.io for more details or to try it for free.